Minting an NFT—the fancy term for “creating on the blockchain”—is a seamless experience, if you follow these beginner-friendly steps.
In this guide, we’ll focus on Ethereum, the most popular blockchain for NFTs, and OpenSea, the most popular NFT marketplace.
Get a crypto exchange account
The first step in minting your NFT—or doing anything in crypto—is getting a crypto exchange account like Coinbase or Kraken. Crypto exchanges are where you can easily buy and sell cryptocurrencies.
You need a crypto exchange account because you need to buy Ethereum to pay for the one-off fee of minting NFTs—we’ll explain that in the next section.
And hey, if your NFT sells, you may want to cash out your earnings, convert to another cryptocurrency, or do other stuff a crypto exchange lets you do.
If you don’t have a cryptocurrency exchange account, here’s a guide to help you make a decision.
Buy Ethereum
Ethereum is the blockchain on which the majority of NFTs are built. Ethereum, or ETH, is also the name of the native currency of that network. So when you sell and buy NFTs, you’re most likely to use Ethereum.
Ethereum is listed on almost all crypto exchanges (it’s the second-largest cryptocurrency after all), so you won’t have trouble buying it.
But why buy Ethereum to sell an NFT?
To buy and sell NFTs, you'll usually use an NFT marketplace, which are like eBay or Amazon for NFTs. By far the biggest one of those is OpenSea, which accounts for 97.8% of all Ethereum NFT trade as of October 2021. That’s the marketplace we’ll cover here.
Signing up for OpenSea costs Ethereum.
You’ll need to pay for what’s called “initialization”—a one-time fee paid in Ethereum to sign up for the platform.
How much Ethereum will you need? Well, the gas price (as the unit of Ethereum transaction fee’s called) fluctuates massively, so there’s no good answer. Depending on the network conditions (how busy it is), it can be as low as $30 or as high as $300.
Get a crypto wallet
Refer to the previous lesson on "How to Buy an NFT" to learn how to get a crypto wallet on MetaMask.
Send Ethereum to your crypto wallet
Now that you've bought Ethereum on a crypto exchange and also have your MetaMask up and running, it’s time to load your crypto wallet with some Ethereum.
Refer to the lesson on "How to Buy an NFT" to learn how to send Ethereum to your MetaMask wallet.
Sign up for OpenSea using your crypto wallet
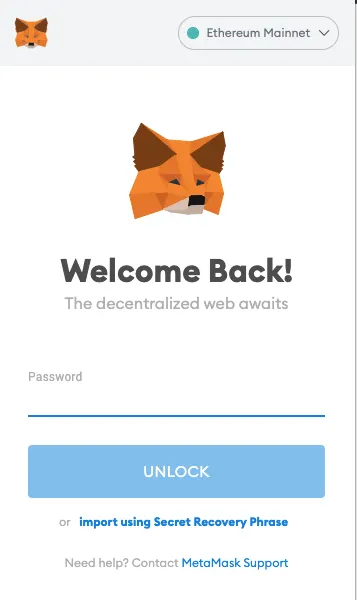
First, click on the little fox logo on your browser and enter your password to unlock MetaMask.
Then go to opensea.io (use the same browser where your MetaMask is installed). Once on the website, click "Profile” on the top-right corner.
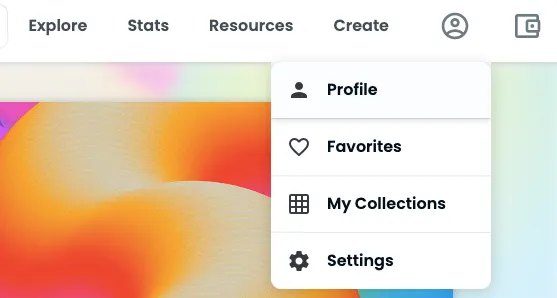
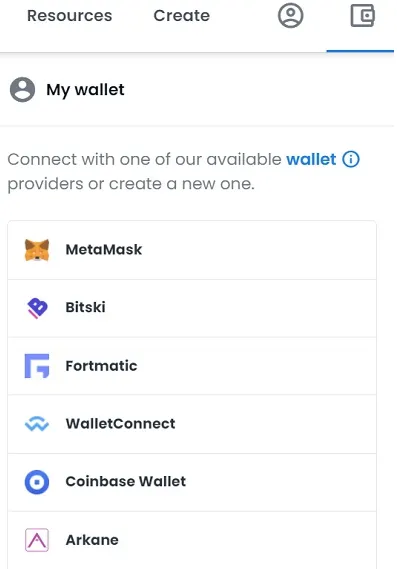
You will be prompted to connect your crypto wallet, so choose your wallet.
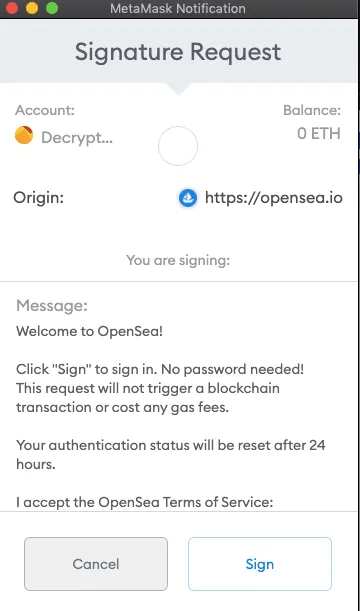
OpenSea will ask you to accept the terms and conditions on your Metamask. It’s a sign that your wallet’s successfully connected with MetaMask! Click “Sign” if it all looks good.
Your “Unnamed” profile is created! You’ll need to enter a username and an email address to verify your account. You can include more details like social media, but none of it is necessary. Your Opensea account’s pretty much good to go.
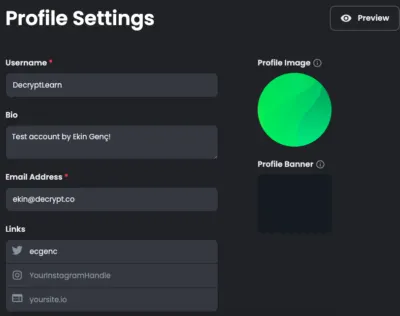
If you’ve taken care of the verification email, then your profile should be all set! Now it’s time to create your NFT.
Create your NFT
To mint an NFT on OpenSea, click “Create” next to your profile picture (just a green dot in this case!) on the top right corner.
Or if you want to mint multiple NFTs as part of a collection, click “My Collections” under your profile picture.
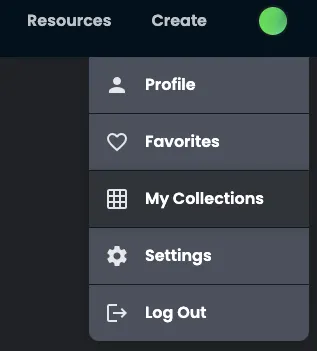
But for the remainder of this article, we’ll only focus on “Create,” which is for one NFT.
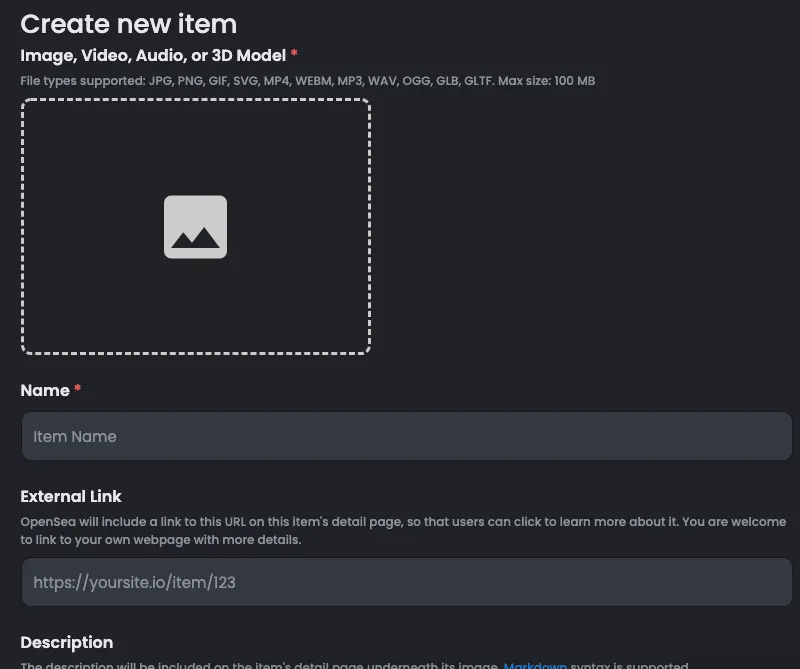
Here’s the page where things get real!
You can upload a supported file from your computer as an NFT. You’ll need to name your NFT, but no other details are necessary. But it’s a good idea to write a brief description.
For your first experiment, you can leave the rest of the options as default. After uploading a file and naming your NFT, just scroll down and click “create.”
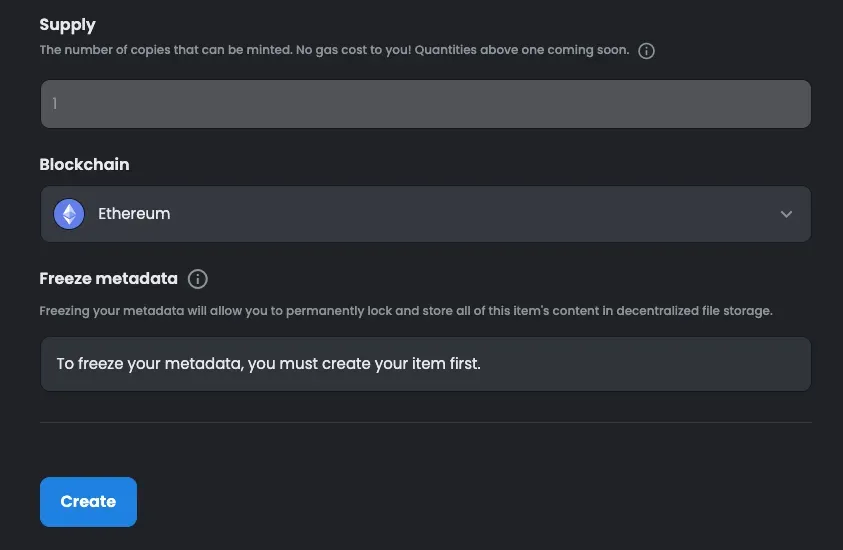
We’ll use a digital image as an example—a photo taken by your reporter in Antalya, Turkey.
And voila. This is how your NFT will appear on OpenSea:
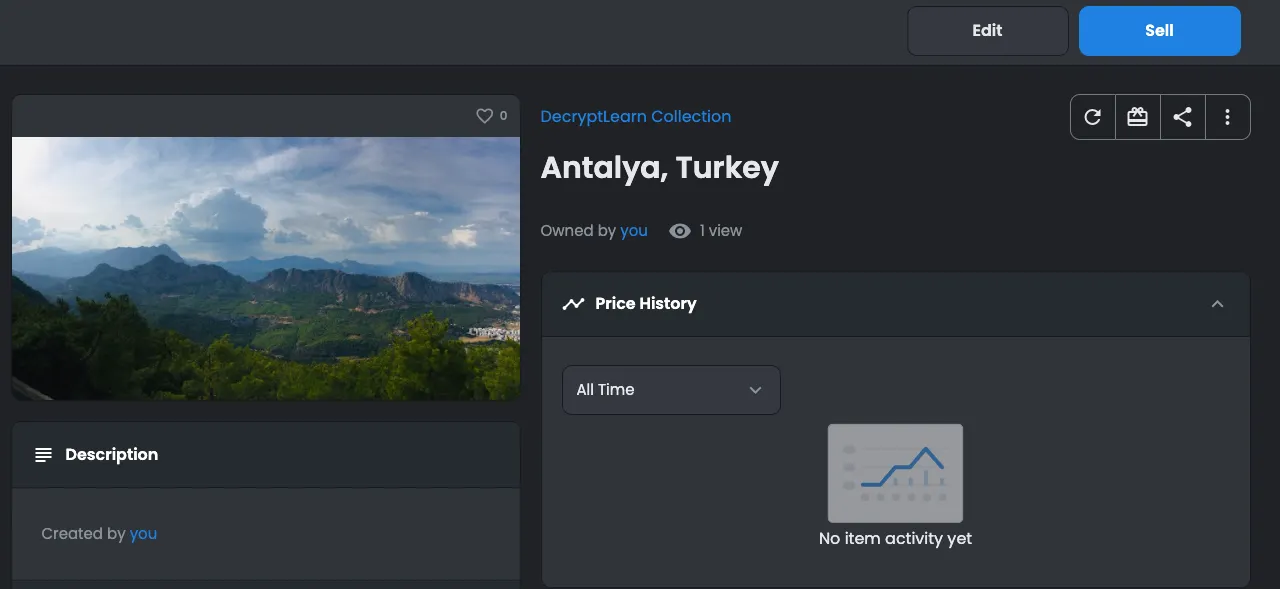
But it’s not listed for sale yet. To list your NFT for sale, click “sell” on the top right, and the following page will appear.
You can sell it for a fixed price or you can put it up for auction. If listing for a fixed price, you won’t pay for the gas fee (remember, any transaction on Ethereum incurs these transaction fees). Instead, the buyer will bear the burden of gas. For auctions, sellers pay the gas. Let’s set an ambitious target of 1 ETH for this photo.
Remember, OpenSea will charge 2.5% in commission fees when your NFT sells.
When you’re ready, click “complete listing.”
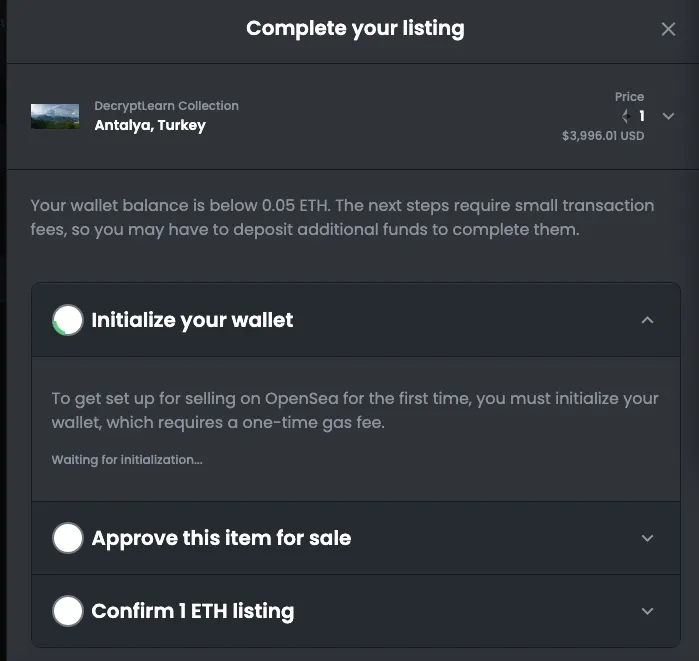
Before it’s listed for sale, OpenSea will ask you to sign a few things through your MetaMask wallet.
Since it’s your first time selling on OpenSea, you’ll need to initialize your wallet. This is where you get to spend that Ethereum you bought and transferred to your wallet!
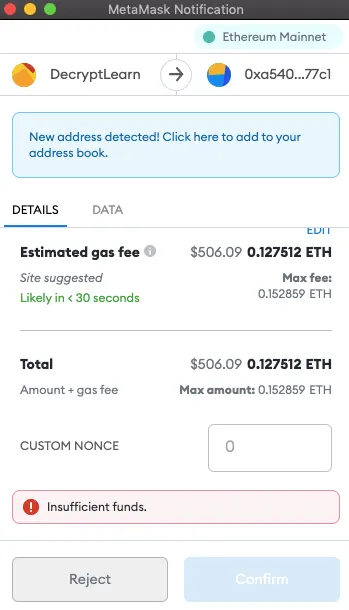
For wallet initialization, MetaMask will calculate a gas fee for you. If there’s not enough money in your wallet, the “confirm” button won’t appear (as is the case here). If there are sufficient funds, then just click “confirm” and you’ll be initialized in a couple of minutes!
OpenSea will also ask you to approve the item for sale, and it will ask you to confirm the price you want to list it for. All you need to do is just sign them off through MetaMask.
And that’s it—congratulations on minting your first NFT!
If you want to understand the buying side of NFTs, take a look at this guide.
Cheat Sheet
Here are the steps involved in minting an Ethereum NFT on OpenSea:
- Get a crypto exchange account
- Buy Ethereum
- Get a crypto wallet
- Send Ethereum to your crypto wallet
- Sign up for OpenSea using your crypto wallet
- Create your NFT
Up Next
You may have heard the terms NFT and Web3 uttered in the same breath. In the next lesson, we will learn what Web3 is and what it has to do with NFTs.
